How to Create a Glow in the Dark Pendant

Click here to purchase our resin and glow in the dark powder!
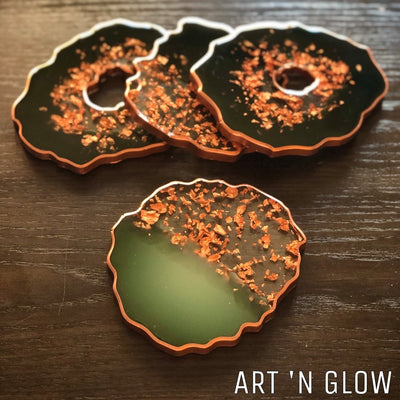
Here at Art 'N Glow, we love to show off what people have done with our products, especially when they glow! Today, our friend @woodenneon is taking us step-by-step on his journey to create mesmerizing and unique Glow in the Dark Pendants. Prepare to get your creative juices flowing - this easily customizable project will open new doors and inspire your future resin and woodworking ideas.
Materials Needed
- Art 'N Glow Epoxy Resin Kit
- Art 'N Glow Powder (get creative by using multiple different colors)
- Block of wood
- Dremel or table saw
- Table sander or Dremel sanding attachment
- Several small disposable cups
- Stirring sticks
- Masking tape or painter's tape
- A level
- Sandpaper (80-200 grit for shaping; 400+ grit for polishing)
Step 1: Cut grooves in the block of wood using a table saw, Dremel, or similar tool. Use this opportunity to create your own distinct and extraordinary design.
Step 2: Place a drop cloth underneath table or work area and verify that the table is level (resin can flow to one side if not perfectly level).
Step 3: Create a barrier of masking tape or painter's tape on the ends of your wood block. Press the tape in place so that it sticks up at least a half an inch.
Step 4: Measure equal parts resin and hardener by volume to create the resin mixture you will use in the next step. It is important to make sure this mixture is stirred thoroughly removing any streaks of resin.
Step 5: Thoroughly mix 1 part glow powder to 4 parts resin mixture (i.e. 7 grams glow powder to 1 ounce of resin mixture). This is what we consider to be the perfect ratio for the brightest glow!
Step 6: Carefully pour the glowing resin mixture into the grooves that you previously cut into the wood block. Allow the resin to cure for at least 24-72 hours before continuing.
Step 7: After the resin has completely cured, cut your block of wood into smaller, pendant-sized pieces.
Step 8: Now that you have separate pieces to create various pendants, use a sander to shape each piece into its own individual and unique shape.
Step 9: Use the sandpaper to polish each small pendant piece, by lightly sanding, in order to create a smooth finish. After sanding, wipe down the surface with a solvent such as denatured alcohol or acetone.
Step 10: For the final effect, apply a wood finish of your choice to each pendant. You can use this as an opportunity to explore further color combinations; create higher contrast around the glowing resin by using a darker finish, or stick with a clear polish finish for a more natural appearance.
Step 11: Your glowing wooden pendant is complete! Turn it into a necklace, keychain, or any other unusual idea you may have by attaching it to lace or string of your choice.

Don't forget to tag your final product with #artnglow so we can see all of the spectacular designs that you create!
The sky is the limit when creating these beautiful, glowing wooden pendants! Explore your possibilities with different shapes and color combinations for various visual effects. In this tutorial, @woodenneon uses neutral glow powder, however, Art 'N Glow offers Florescent Glow Pigments as well. You don't even have to limit yourself to using our Glow Pigments - we also offer a variety of Pearlescent and Thermochromic Pigments for you to experiment with, and our inventory of products and colors is always expanding!


Hello Ulrich,
You can check out all of our products on our website at www.artnglow.com :)
J’apprécie votre travail. Ou trouve t-on les produits ?
Leave a comment