Create Resin Coasters to Ring in the Holidays

Create festive holiday coasters with this fun project using Art 'N Glow Epoxy Resin. Our epoxy resin can be used to create everything from resin coated artwork and tumblers to dice, coasters and jewelry. Today, we're going to show you how to use our epoxy resin to create one-of-a-kind holiday coasters that are sure to catch your guests' attention.

Create festive holiday coasters with this fun project using Art 'N Glow Epoxy Resin. Our epoxy resin can be used to create everything from resin coated artwork and tumblers to dice, coasters and jewelry. Today, we're going to show you how to use our epoxy resin to create one-of-a-kind holiday coasters that are sure to catch your guests' attention.

What Type of Castings Can be Made with Resin?
Making serving trays and coasters with resin are fun projects especially if you are just learning how to work with epoxy resin. With a simple silicone mold, you can easily learn the basics of resin casting, and create a unique custom piece for your home. To make a really original piece, you can add different pearl pigments or inclusions to your resin like these beautiful pieces. Continue reading to learn how to create your own original holiday coasters. Use these same techniques to create trays and coasters like the ones you see here!
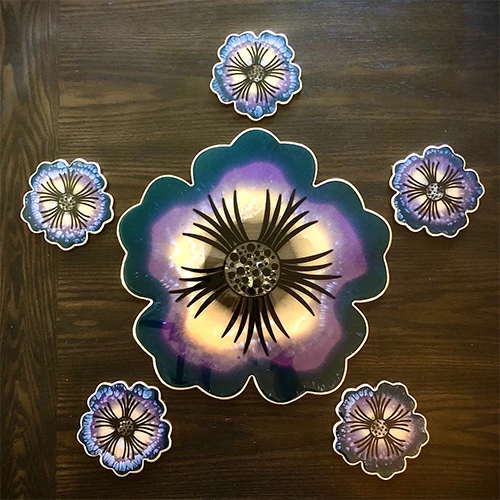
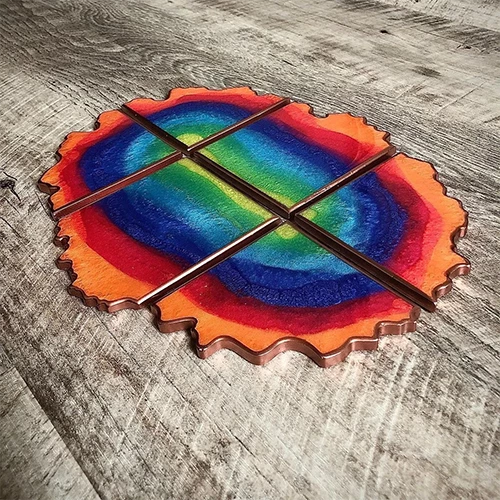
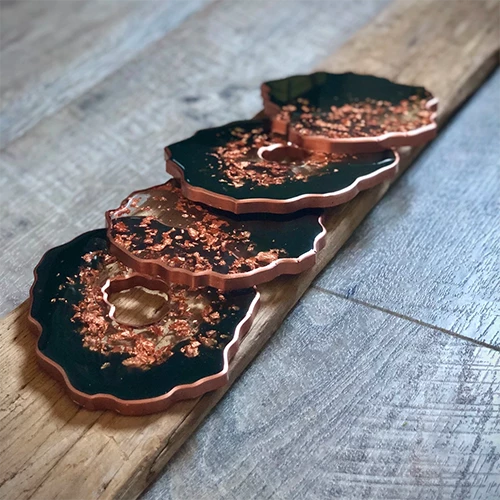
Art by: Megan Hogeman

Art by: Megan Hogeman
DIY Project: Holiday Coasters
Materials to Make your Resin Holiday Coasters
-
Silicone Coaster Molds (4" circle coasters were used for this project)
-
Gold or Copper Gilding Paint Pen
-
Mixing Cups
-
Stir Sticks
-
Gloves
-
Silicone Mats (Table Protector)
-
Painter's Tape
-
Mixed Letter Beads
-
Mini Holiday Embellishments

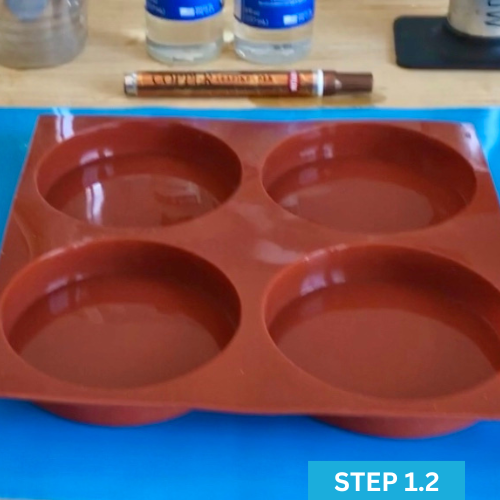


Step-By-Step Instructions
Step 1: Prepare your workspace. Gather your Art ‘N Glow Resin, silicone mold, mixing cups, stir sticks, Christmas goodies and gloves.
Step 2: Measure your resin. The silicone coaster molds used for this project can hold 4 fl. oz. each. We are not going to be filling them up to the top, also we will be pouring these in 2 layers. So, just pour about 3 fl. oz. resin and 3 fl. oz. hardener (1:1 ratio by volume) and combine.
Step 3: Mix your resin & hardener for about 5 minutes, making sure to scrape the sides and the bottom edges to ensure it is fully mixed until there are no striations left. Pour your resin mixture evenly (about 1.5 fl. oz.) into each of the 4 molds.
Step 4: Using your stir stick, make sure to bring any bubbles trapped in the corners up to the surface. Let your resin sit for about a minute and then use your torch to remove and remaining bubbles. Use the torch in a sweeping motion a few inches above the resin surface.
Step 5: Time to add all of your fun festive trinkets and letters. Chose some funny phrases that’ll get a giggle or two to make things fun. You can spell out anything, really! When placing your letters down, make sure it’s the correct side DOWN and facing the proper direction.
Step 6: Now go ahead and add your mini-holiday pieces around your letters. At this point, you’ll notice that the letters may start either drifting or floating together. Just take your stir stick and just keep directing them where they need to go until they stop moving. Double check for bubbles, cover and let cure.
Step 7: Time to mix up your next layer. Pour out the same amount of resin as your first layer. Once your resin is FULLY mixed, pour your final layer of resin into your coaster molds on top of your previous work. Wait a few minutes and torch out any bubbles. When you’re finished, cover and let cure for at least 24-72 hours.
Step 8: Pop out those coasters and check your work!
Step 9: Lightly sand the bottom edges. Just gently sand if needed, you don’t want to see scrape marks on the bottom!
Step 10: Now it’s time to do some gilding! Shake up that gilding paint marker. Shake shake shake! With these tips on the markers, it makes it so much easier to make a nice even line against those edges. We recommend 2 layers of paint: 2 on the corners and 2 on the sides, done separately. Make sure you let it dry in between layers!
Step 11: Tape the bottom of your coasters. Once your coasters are ready to roll, you’ll want to tape off the bottom in preparation to do a flood pour.
Step 12: For the flood pour, mix about a total of 3 fl. oz. resin and hardener mixed together. Just go ahead and pour it on top of your coasters, paying mind to those edges and sides. Coat the entire coaster with your resin. Cover and let cure for at least 24-72 hours.
Step 13: Grab your Art N’ Glow Heat Gun, Wave it over the painter's tape that you applied to protect the bottoms of your coasters. It should pull right off. There you have it! Voila!! Enjoy :)


Art by: Megan Hogeman
What People Are Saying
I have been using this resin for over two years now. I have tried many others, but found artnglow brand works the best for me.
- ArteByKristina
This is the best resin!!!! It's so easy to use! Nice and clear results! When mixed slowly for 5 minutes, most, if not all, bubbles will be gone! This product comes with detailed easy instructions and tips.
I have recommended this brand to many friends and members of resin groups and after using it, they are in love too!
If you're looking for a great resin! Get this!!! You won't be sorry!!!
- Kimberly N.
Commonly Used To Create With Resin
Heat Gun
-
Multi-functional heat gun for various projects
-
Perfect for epoxy resin art and creating cells in artwork
-
Compact, portable, and lightweight design for convenience
-
No need for gas refills like a torch
-
High-quality materials with a 100% money back guarantee!
-
Multi-functional heat gun for various projects
-
Perfect for epoxy resin art and creating cells in artwork
-
Compact, portable, and lightweight design for convenience
-
No need for gas refills like a torch
-
High-quality materials with a 100% money back guarantee!
Visit Our Blog For Resin Project Inspiration
Want Free Stuff?
Join our email list to be notified of new project guides, special offers, free products and more!
Sign up now and receive a free Aqua glow powder sample!
Want to share your art with us?
Follow and tag us in your work to be featured on our pages!


