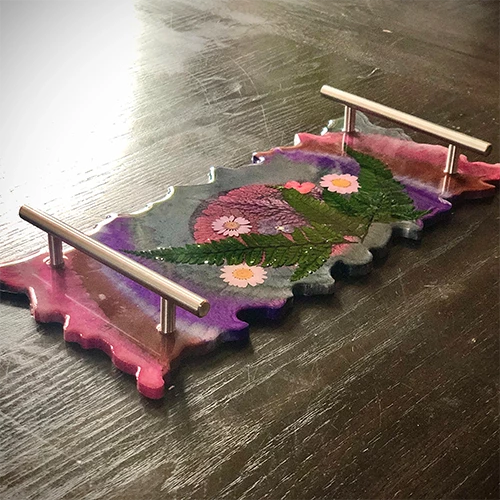
Create a Resin Serving Tray
Creating your own resin serving tray allows you to customize the design, colors, and finishes, making it a unique and personalized piece. In this guide, we will take you through the step-by-step process of creating a resin serving tray, from selecting the materials to the final finishing touches. Whether you want a sleek and minimalist tray or a vibrant and artistic one, this guide will help you bring your vision to life. Let's dive into the world of resin and create a stunning serving tray that will impress your guests and elevate your hosting game.
Creating your own resin serving tray allows you to customize the design, colors, and finishes, making it a unique and personalized piece. In this guide, we will take you through the step-by-step process of creating a resin serving tray, from selecting the materials to the final finishing touches. Whether you want a sleek and minimalist tray or a vibrant and artistic one, this guide will help you bring your vision to life. Let's dive into the world of resin and create a stunning serving tray that will impress your guests and elevate your hosting game.

What Type of Trays Can be Made with Resin?
Resin trays are not only functional but also provide an opportunity for creative expression. Whether you want to organize your trinkets, serve food in style, or add a unique decor piece to your home, making resin trays allows you to personalize and customize them according to your taste. With a variety of designs and techniques to choose from, you can create stunning and functional trays that are sure to impress.

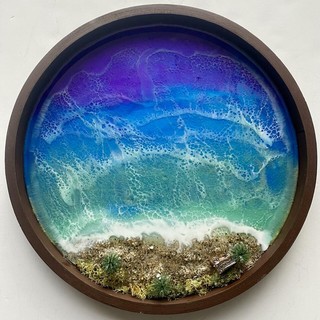
Art by: Megan Hogeman
Art by: Megan Hogeman
DIY Project: How to Make a Tray with Resin
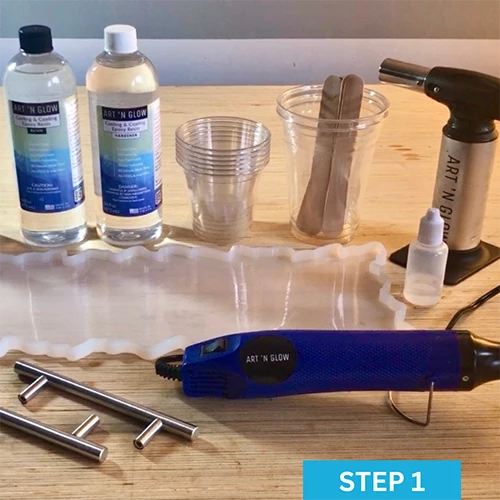
Materials to Make your Own Resin Serving Tray
-
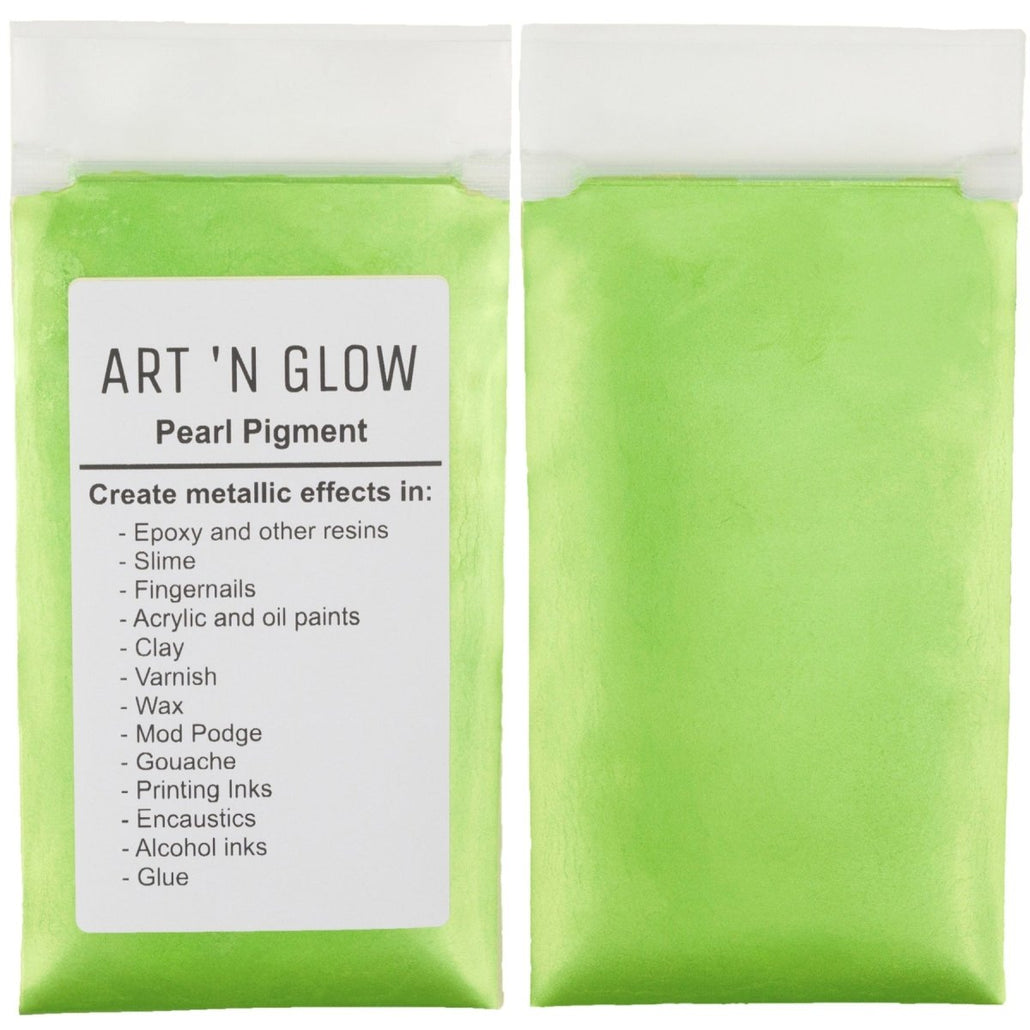
Art 'N Glow Pearl Pigments (Purple, Black and Fuschia were used for this project)
-
Acrylic Paints (colors of your choice)
-
Level
-
Plastic disposable cups for measuring and mixing
-
Stirring utensils (i.e. popsicle sticks)
-
Gloves
-
Pressed Flowers (optional)


Step-By-Step Instructions
Step 1: Prepare your workspace! Set up in a well-ventilated area. Make sure you have a level surface to work on & put down your silicone mat in case of any spillage. Gather all of your Art ‘N Glow products, set them up and make sure your molds are clean and ready to go.
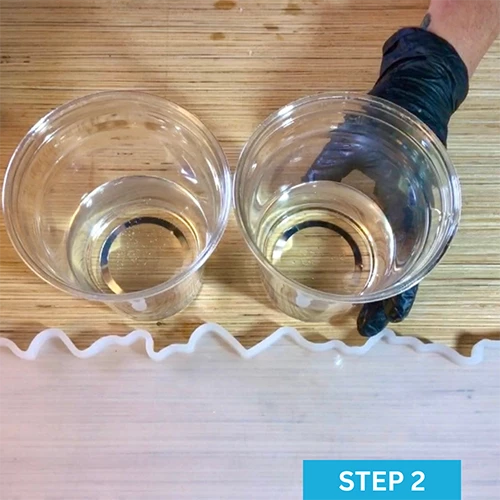
Step 2: Mix your resin in equal parts of 5 fl.oz. resin and 5 fl. oz. hardener to total 10 fl. oz. Combine & stir for about 5 minutes to ensure your resin is mixed properly. If you see any striations, it’s not quite mixed yet. This will be enough resin to fill the entire mold in one pour. Do not let your mixed resin sit in your mixing cup for too long. It is a thermosetting resin, and any increased temperature can cause the curing process to being sooner than usual.
**Pro-tip: The working time of Art 'N Glow Epoxy Resin is approximately 40 minutes when your materials and workspace are at the recommended temperate range of 72°-85°F (the closer to 78°, the better).
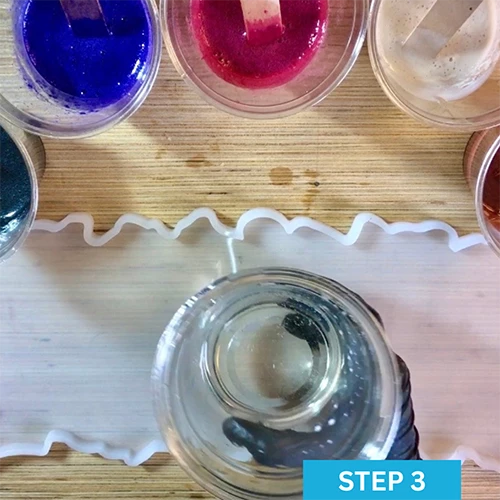
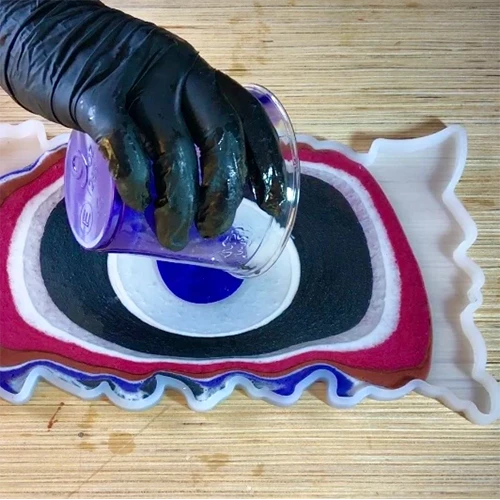
Step 3: Mix your resin and pigments. Get out your smaller mixing cups to put your different colored Art ‘N Glow Pearl Pigments into & additional cups for your acrylic paint colors or other resin pigments you are using. Using your stir sticks, get one heaping stir stick tip of pigment for each mixing cup. Pour your resin on top of the pigment powder. For the alcohol ink cup, add the resin first & then add about 20 drops of the white alcohol ink. Leave at least 3 oz of clear resin to pour in between layers of colors & white.
Note: Feel free to use your plan & colors for mixing and combining the resin with any additives if you prefer! You don’t have to even keep the clear to pour in between layers. Make your project your own!
Step 4: Time to pour. After divvying up your pigmented resin cups & the clear cup, now it's time to start pouring! In a puddle pour, we recommend starting with a little clear resin first to help the colors flow a little better in the mold. Start layering in those colors, one on top of the other right in the center. Just keep layering until you use all of your resin or if you fill up your mold. Cover & let cure for at least 24 hours.
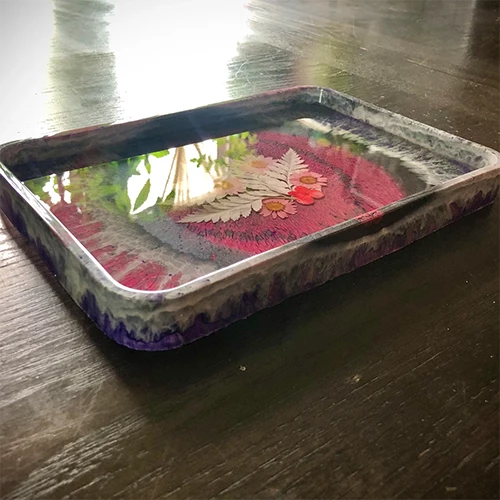
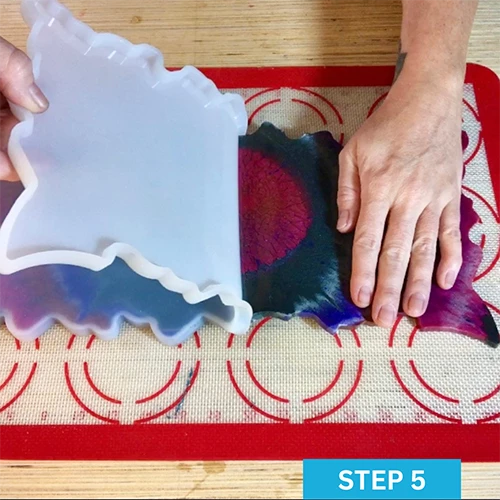
Step 5: Time to demold your project! Pop that cured resin masterpiece & check out the front of your tray.
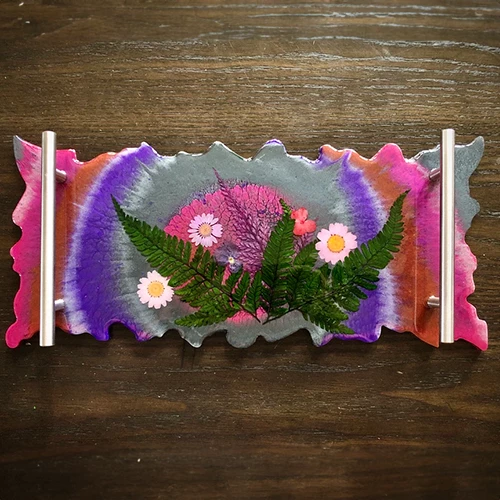
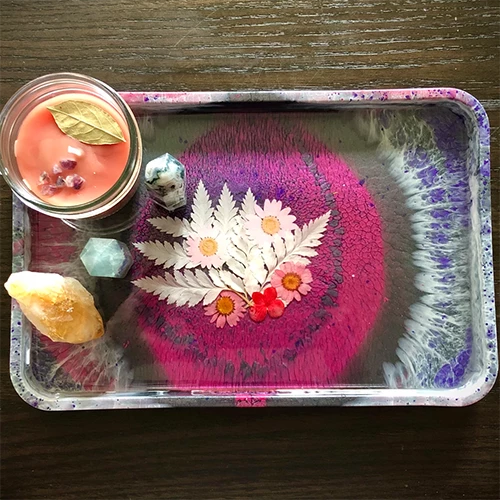
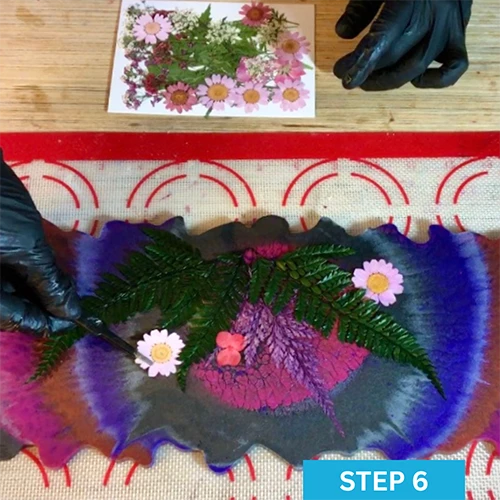
Step 6: Add flowers (optional). Sometimes with puddle pours, you may not be happy with the very middle of the pour after it has cured. So, one way to fix this it to arrange some flowers in the middle! You can use pressed ferns & florals & adhered them with a little super glue. Then, pour resin over them to secure them in place. Use your heat gun or torch in a sweeping motion 6-8 inches above the surface to remove the bubbles. Cover & let cure for at least 12 hours.
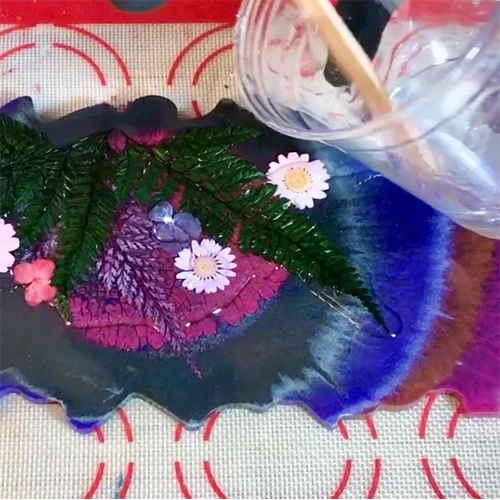
Step 7: Time to do the final pour (dome coat)! Now that the flowers are secure under a thin dome coat, you can continue by covering the entire tray in a final dome coat. Using your stir stick, make sure you push your resin to all the edges of your geode artwork.
Step 8: Add the handles. There are a few different ways to add handles to your tray. You can rest the handles in place in the final coat of resin on top of the tray (which is what was done for this tray), or you can choose drill through the tray. Either way would work great! Cover & let cure for at least 24 to 72 hours.
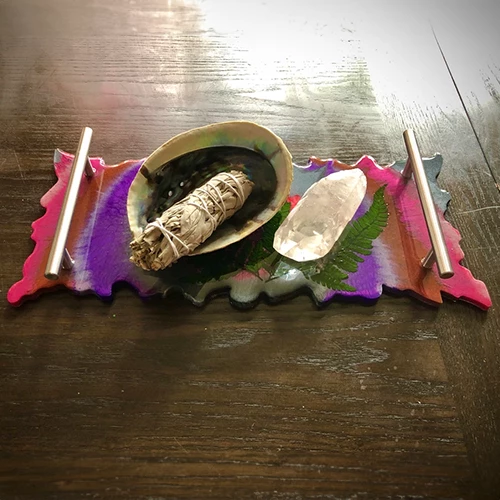
Voila! Enjoy your masterpiece, made by you!

Art by: Megan Hogeman
What People Are Saying
I love this shade of purple! It’s perfect. I make lots of ocean scenes with my epoxy resin and I got tired from regular blue colors so I decided to try and add purple. The results are stunning.
- ArteByKristina

Very pleased with the ease of use and clarity of this product! Very happy with the outcome.
- Trish P. - Beachwalker Boutique
Casting & Coating Epoxy Resin
Commonly Used To Create With Resin

Silicone Molds

Glow Powder
Pearl Pigments
Silicone Molds
Glow Powder
Pearl Pigments
Visit Our Blog For Resin Project Inspiration


Want Free Stuff?
Join our email list to be notified of new project guides, special offers, free products and more!
Sign up now and receive a free Aqua glow powder sample!
Want to share your art with us?
Follow and tag us in your work to be featured on our pages!