Create Resin Jewelry
Create original jewelry with this fun project using Art 'N Glow Epoxy Resin! Our epoxy resin can be used to create everything from resin coated artwork and tumblers to dice, coasters and jewelry. Today, we're going to show you how to use our epoxy resin to create one-of-a-kind jewelry pieces!
-
Learn all about resin jewelry
-
Be inspired by videos, images, and tips from real people who are familiar with the ins and outs of creating resin jewelry pieces
What Type of Jewelry Can be Made with Resin?
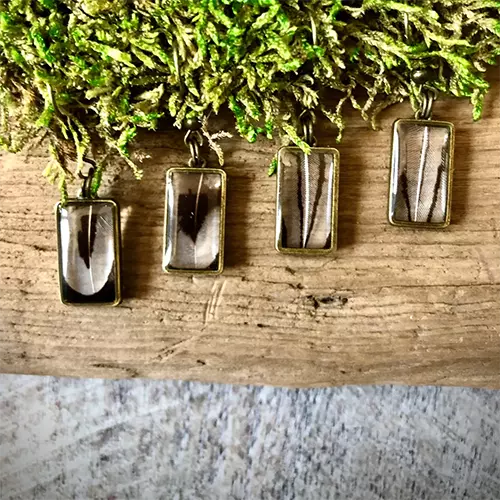
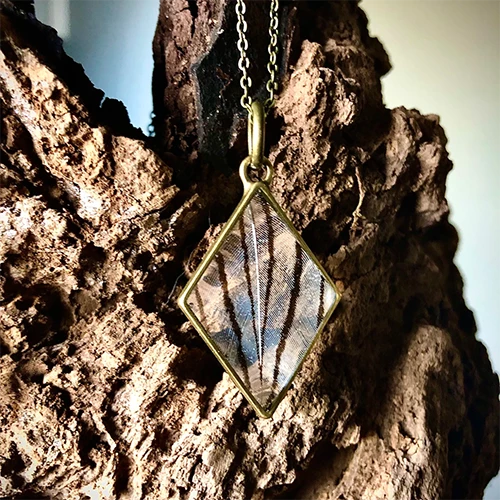
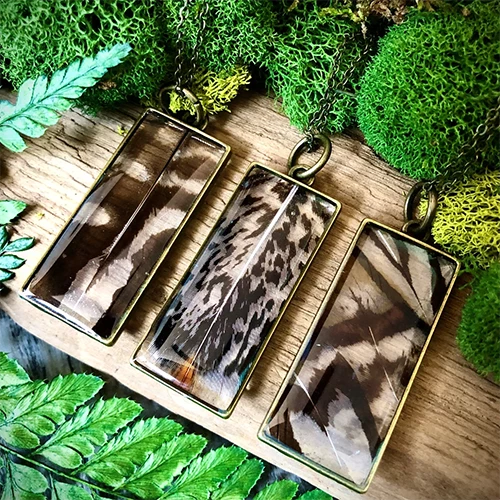
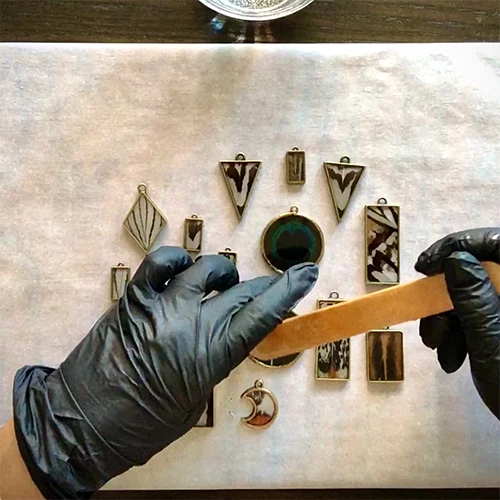
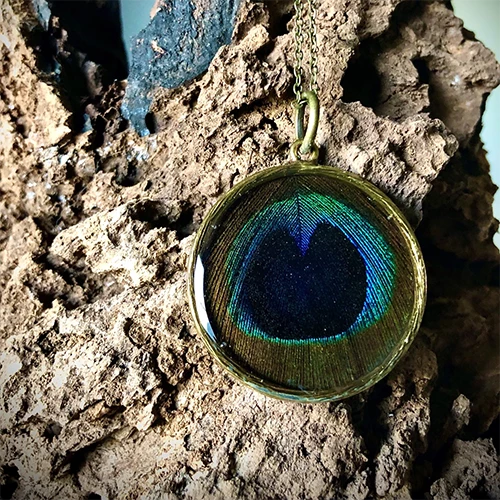
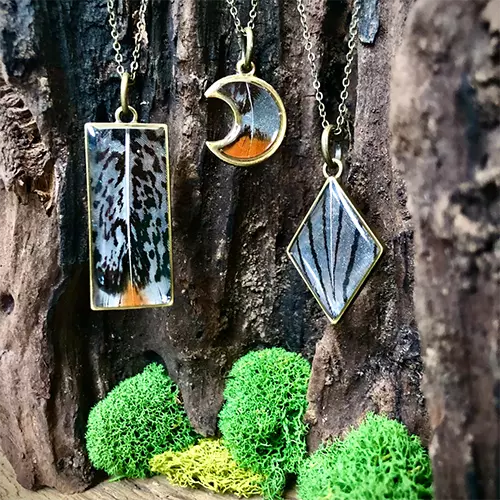
Making jewelry with resin is a fun project for you to get started with epoxy resin. With a simple pendant mold, you can easily learn the basics of resin casting as well, and you will create a beautiful piece of jewelry as a result. To make a really original piece, you can add inclusions to your resin like these beautiful pieces created with resin and feathers. Continue reading to learn how to create your own original resin jewelry, like the ones in these pictures!
Art by: Megan Hogeman
Art by: Megan Hogeman
DIY Project: How To Make Jewelry with Resin
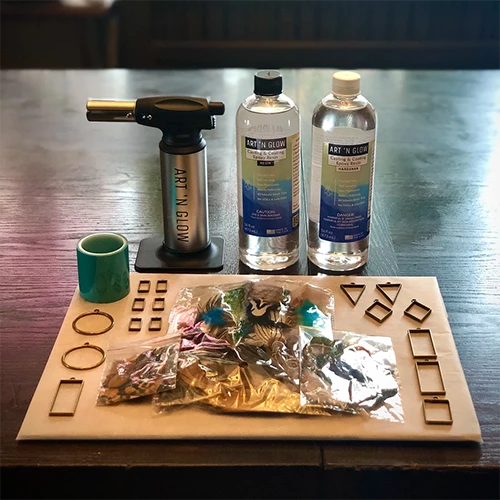
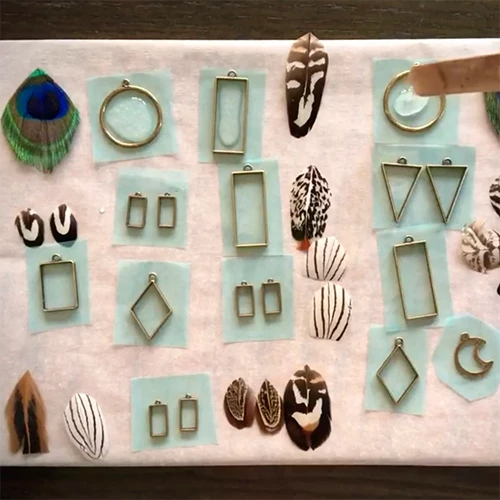
Materials to Make your Own Original Resin Jewelry with Feathers
-
Resin Tape and Masking Tape
-
Open Bezels
-
Jump Rings and Chain Clasps
-
Needle Nose Pliers
-
Feathers
-
Scissors and Exacto Craft Knife
-
Parchment Paper
-
Plastic disposable cups for measuring and mixing
-
Stirring utensil (i.e. popsicle sticks)
-
Gloves
Optional:
Step-By-Step Instructions
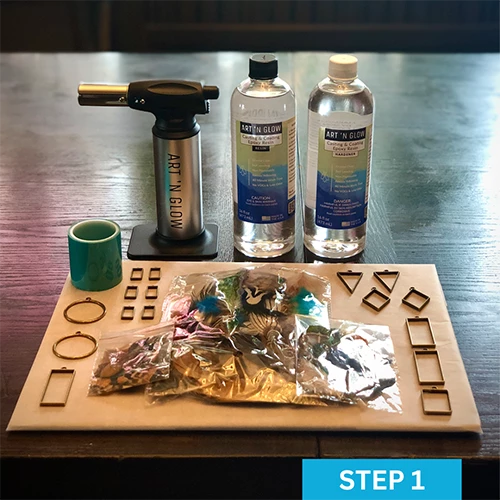
Step 1: Prepare your Workspace. Make sure your workspace is level, put down a big piece of parchment paper & tape it down with masking tape to prevent it from sliding. Get out your feathers, bezels, resin tape & Art ‘N Glow supplies.
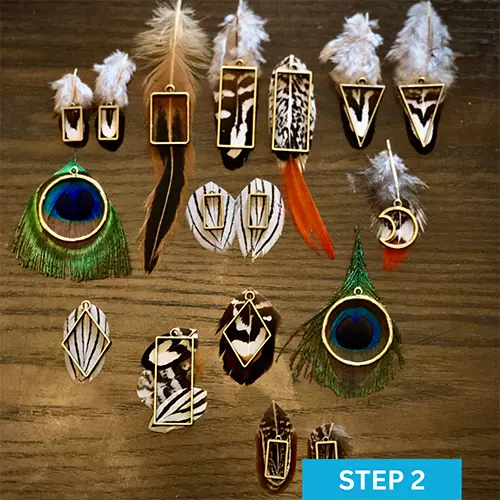
Step 2: Sort out your feathers for each bezel to make sure they will fit & arrange to get a preview before you commit. Trim any bushy parts of the feather off, leaving all smooth & prepped feathers.
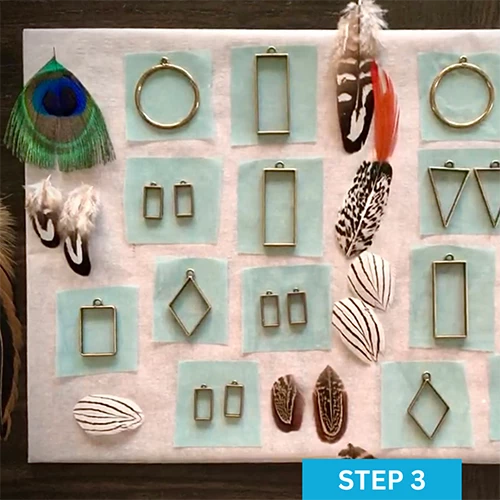
Step 3: Resin tape your bezels. Cut one piece at a time avoiding as best you can to not get fingerprints all over your resin tape, especially where the open bezel is placed. Make sure the tape is secure on all sides & corners of your bezels.
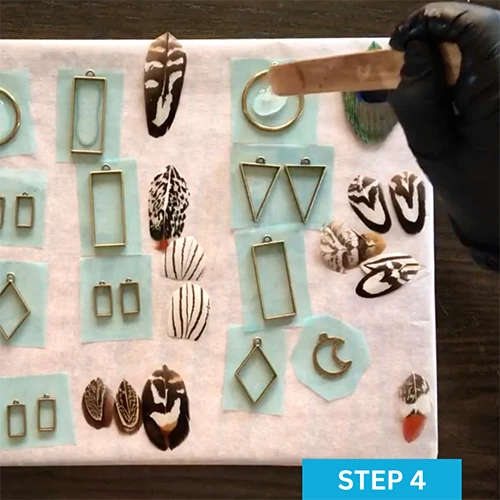
Step 4: Pour your first layer of resin. Mix together a smaller amount of resin (1:1 ratio by volume), just enough to get a single thin layer inside each open bezel. Slowly put resin into the taped/prepped open bezels with your stir stick to control the amount & placement of the resin. Lightly torch on low to remove any bubbles. Make sure you mix your resin and hardener for several minutes.
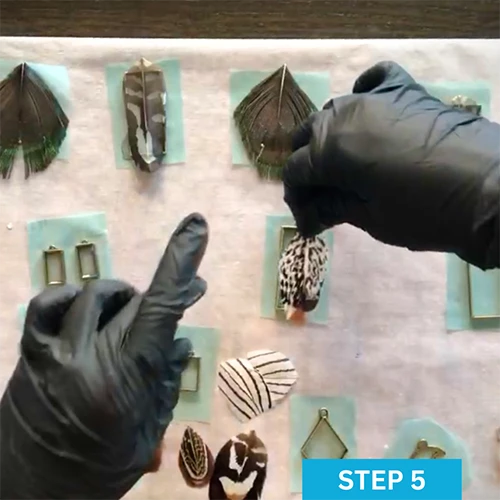
Step 5: Lay prepared feathers on top of the resin layer you just poured inside the bezel. Try your best to make sure there are no bubbles underneath the feather you laid down. When finished, cover your project. Let it cure for 24 hours.
*Artist tip: Use picnic tents to cover resin projects. It keeps dust out & you can keep an eye on your project without disturbing it!*
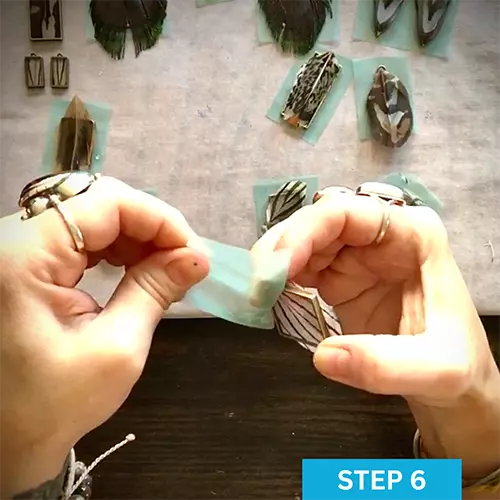
Step 6: Check out your work! Pick up each bezel and carefully & slowly peel the resin tape off the back of your bezels, making sure no sticker residue is stuck to the resin.
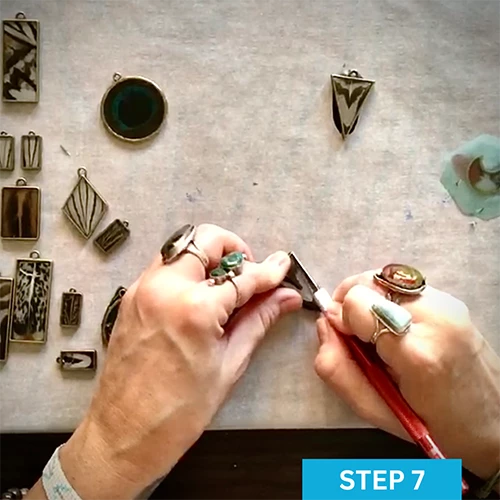
Step 7: Time to trim your bezels. Using your exacto knife, CAREFULLY trim the sides of the feathers & resin sticking “outside the lines” of your feather bezels. I find it easiest to run your exacto knife along the back of the bezel metal so you can then peel the resin/feather parts you’d like to scrap, exactly where you want it!
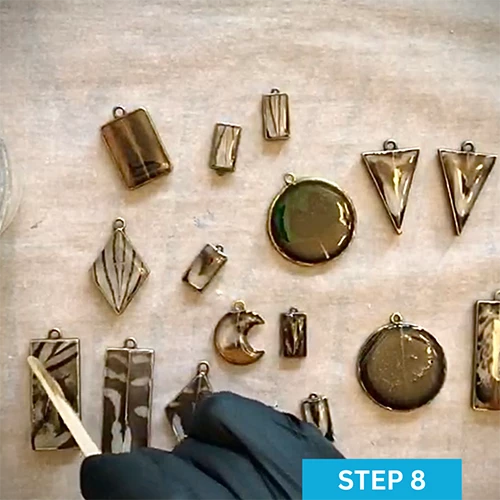
Step 8: Prepare your next layer of resin. With the previously taped side down and the trimmed feather side up, cover the feather up side in a “dome coat” of resin. You can use your stir stick for precision to push the resin to the edges, to cover all of the feather parts & for using tiny amounts of resin at a time. Lightly torch on low to remove any bubbles. Cover & let cure 24 hours.
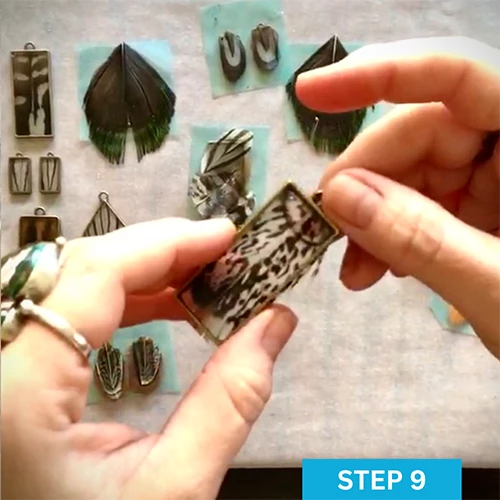
Step 9: Time to start looking for trouble spots. There will most likely be a bubble that got trapped in between the feather & resin tape from your first layer of resin. The way to fix that is open up the bubble & clean up the edges with your exacto knife. This will open up the bubble area to fill in with your top coat of resin. Some won’t need a thing, others will need attention.
*Artist tip: In between each layer of resin, always check your edges for spots that need trimmed and cleaned up with your exacto knife. There will always be spots!*
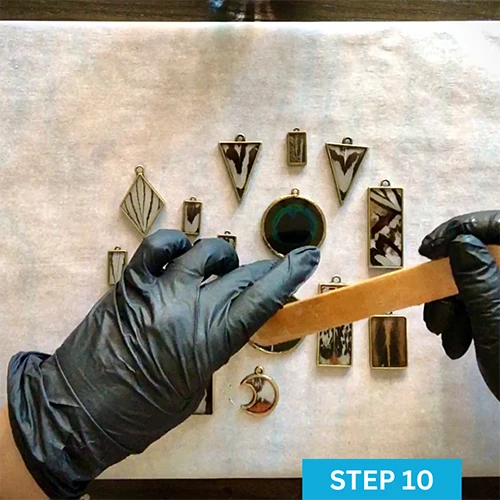
Step 10: Top coat time! Pour the top coat on the front of your jewelry (the original taped side), filling in the trouble bubbles & making that front flawless. Lightly torch on low for any bubbles. Cover & let cure for 24 hours.
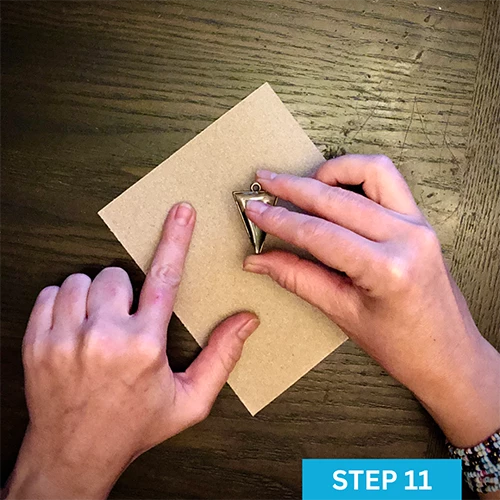
Step 11: Check your work. If you have any feather parts sticking out, you can sand these down with sandpaper and then add another dome coat. Same goes for unevenness, tiny bubbles, any flaws can be carefully sanded and then some coated again to perfection.
*Artist tip: Use 220 grit sandpaper with drips of water on it to prevent resin dust and I feel like it makes the sanding cleaner with less rough edges.*
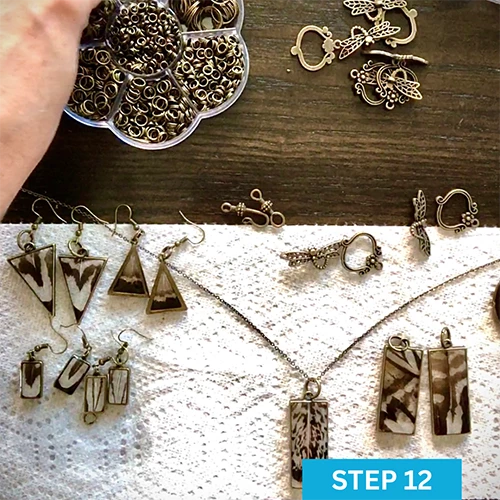
Step 12: Assemble your jewelry! Voilà! There you have it….. beautiful, one-of-a-kind feather jewelry made by you.
Art by: Megan Hogeman
What People Are Saying
This is the best resin!!!! It's so easy to use! Nice and clear results! When mixed slowly for 5 minutes, most, if not all, bubbles will be gone! This product comes with detailed easy instructions and tips.
I have recommended this brand to many friends and members of resin groups and after using it, they are in love too!
If you're looking for a great resin! Get this!!! You won't be sorry!!!
- Kimberly N.
Casting & Coating Epoxy Resin
Commonly Used To Create With Resin
Visit Our Blog For Resin Project Inspiration
Want Free Stuff?
Join our email list to be notified of new project guides, special offers, free products and more!
Sign up now and receive a free Aqua glow powder sample!
Want to share your art with us?
Follow and tag us in your work to be featured on our pages!


