Easy Resin Ideas: How to Add Color to Your Resin Project

Coloring resin is a fun and easy way to add a personal touch to your resin projects. There are many different methods for adding color to resin, ranging from simple colorants to more complex techniques like marbling and layering. No matter which method you choose, the key is to be patient and follow the resin instructions carefully to ensure that your resin cures properly. It is also important to use colorants that are compatible with resin. Adding liquid pigments, paints, or dyes can throw off the chemistry and prevent the resin from properly curing if add too much or the wrong type. We recommend using non-water-based colorants for the best results. With a little practice, you will be able to create a wide range of colorful resin projects that are sure to impress.
Here are a few different ways to color resin:
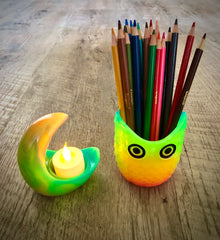

Glow Powder: Art 'N Glow Glow Powders can be added to clear resin to create a glowing effect when charged with UV light and viewed in the dark. Our neutral glow powders appear off-white in the daylight and glow their advertised color in the dark, while our fluorescent powders are tinted with a bright color that is visible in the daylight, fluoresces (reflects UV light), and glows in the dark. (Art by Megan Hogeman)

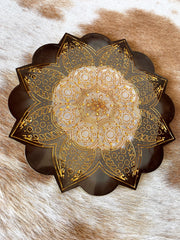
Pearl Pigment: Art 'N Glow Pearl Pigments are mica powders that are fine, shimmery powders that can be mixed into the resin to create a metallic or pearlescent effect. They come in a wide range of colors and can be found at art supply stores or online. (Art by @rbanthology)

Thermochromic Pigment: Our thermochromic pigments change from a color to clear or from one color to another when heat is applied. (Art by @artebyKristina)
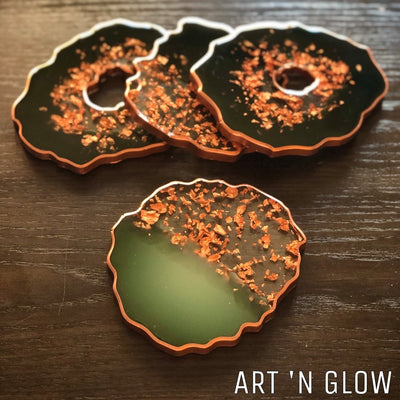
Resin Dye: These are specially formulated pigments that can be mixed into the resin before it is poured. Resin dyes can be either transparent or opaque. A transparent dye will color the resin while allowing light to still pass through your casting. An opaque dye will color the resin and will allow little to no light to pass through the resin. (Art by @artebyKristina)

Alcohol Ink: Alcohol ink is a vibrant, transparent ink that can be added to the resin to create many different effects. Once the resin is poured, you can add drops or splatters of alcohol ink to the surface using a dropper or a paintbrush. You can use a stir stick or a toothpick to swirl and blend the ink into the resin, creating patterns and designs. You may also need to experiment with the amount of ink you use and the way you apply it to achieve the desired color intensity and design. Additionally, alcohol inks can be somewhat unpredictable and may create unexpected results, so it is a good idea to practice on a small scale before attempting to use them on a larger project. (Art by @missmeggieart)

Other Additives and Inclusions: You can also add other materials to the resin to create different effects, such as glitter, beads, or small objects. Just be sure to test the material in a small batch of resin first to ensure it is compatible and does not interfere with the curing process.
How much colorant should I add to resin?
It is important to use the correct amount of colorant in your resin to ensure proper curing. For Art 'N Glow pigments and powders, check out this blog for the perfect pigment to resin ratio: The Perfect Pigment To Resin Ratios – Art 'N Glow (artnglow.com).
The amount of pigment you need will also depend on the type of pigment you are using. Some pigments are more concentrated than others, so you may need to use less of a highly concentrated pigment to achieve the same color intensity as you would with a less concentrated pigment.
In general, a good starting point is to use 1% to 2% by volume of pigment based on the total volume of the resin. For example, for every 100 ml of resin, you would use 1 to 2 ml of pigment. However, this is just a general guideline, and you may need to adjust the amount of pigment based on the specific resin and pigment you are using and the desired intensity of color.
Happy Creating!!


Leave a comment