Create A Resin Tray with Matching Coasters
Create an original flower shaped tray and coasters with this fun project using Art 'N Glow Epoxy Resin, Pearl Pigments and Silicone Molds! Our epoxy resin can be used to create everything from resin coated artwork and tumblers to dice, coasters and jewelry. Today, we're going to show you how to use our epoxy resin to create one-of-a-kind functional projects for your home!
-
Learn all about resin casting
-
Be inspired by videos, images, and tips from real people who love to cast with resin to create amazing projects.
What Type of Castings Can be Made with Resin?
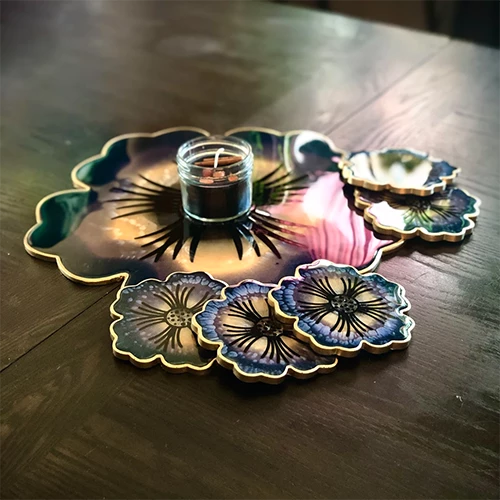
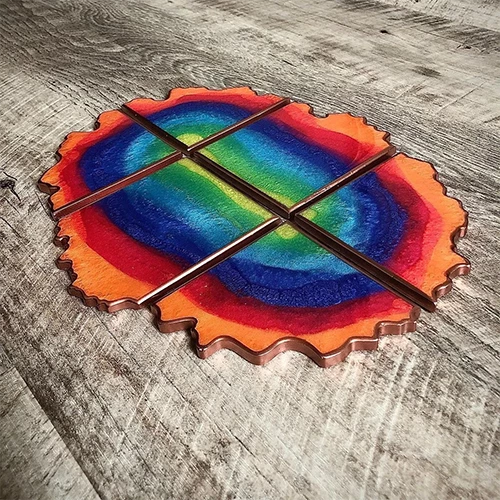
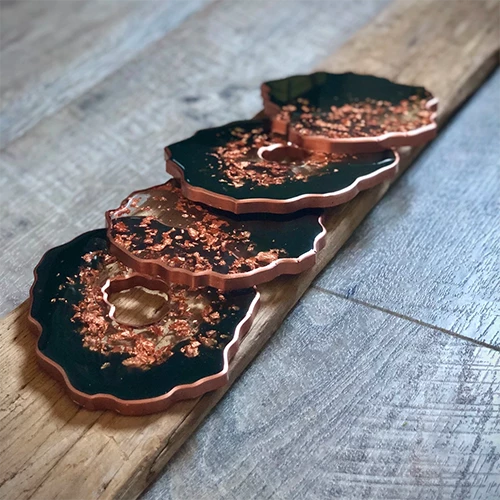
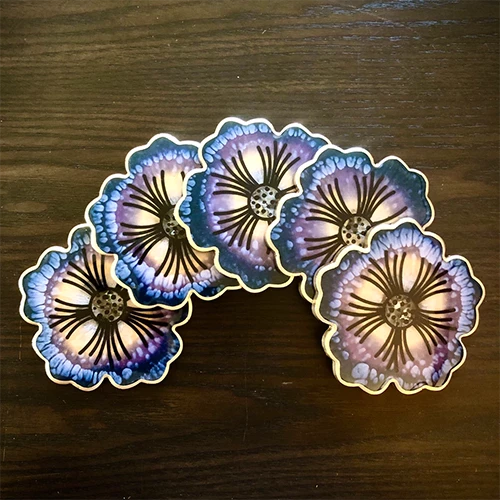
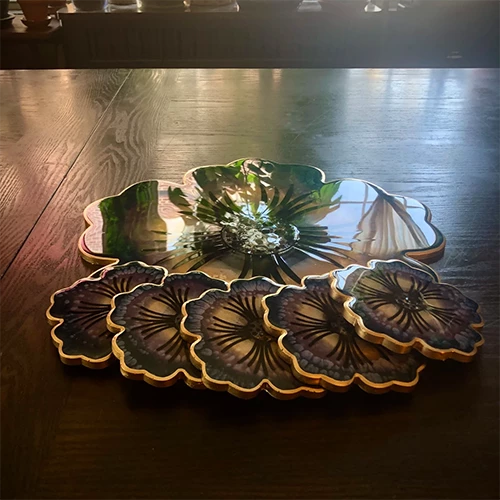
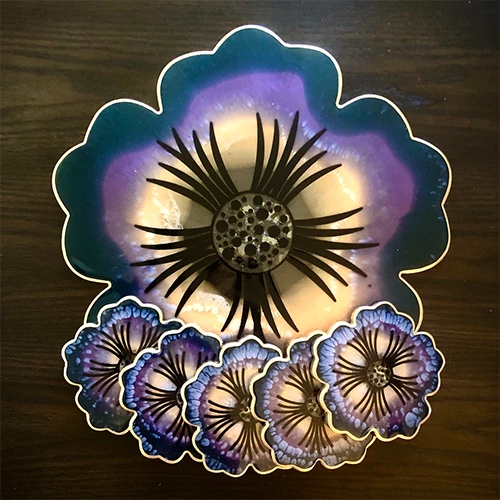
Making serving trays and coasters with resin are fun projects especially if you are just learning how to work with epoxy resin. With a simple silicone mold, you can easily learn the basics of resin casting, and create a unique custom piece for your home. To make a really original piece, you can add different pearl pigments or inclusions to your resin like these beautiful pieces. Continue reading to learn how to create your own original resin trays and coasters, like the ones in these pictures!
Art by: Megan Hogeman
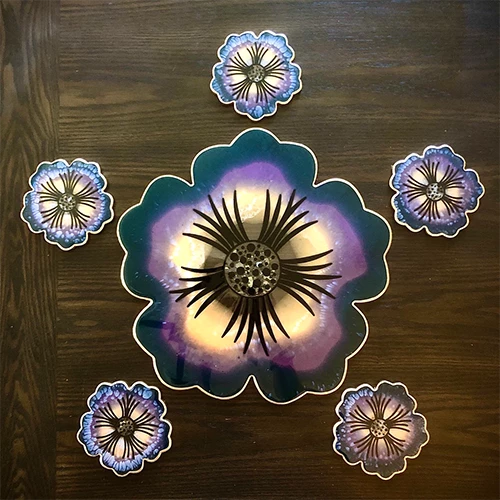
Art by: Megan Hogeman
DIY Project: Make a Resin Tray and Coasters
Materials to Make your Own Original Resin Flower Tray and Coasters
-
Opaque White Pigment Concentrate
-
Flower Center (Crushed Mirror or Gold Leaf)
-
Acrylic Paint (optional)
-
Squeeze Bottle w/Precision Tip (optional)
-
Mixing Cups
-
Stir Sticks
-
Gloves
-
Silicone Mats (Table Protector)
-
Isopropyl Alcohol (for clean-up)
-
Paper Towels
-
Project Cover ( i.e. Picnic Nets)
-
Gold Leafing Pen
Optional:
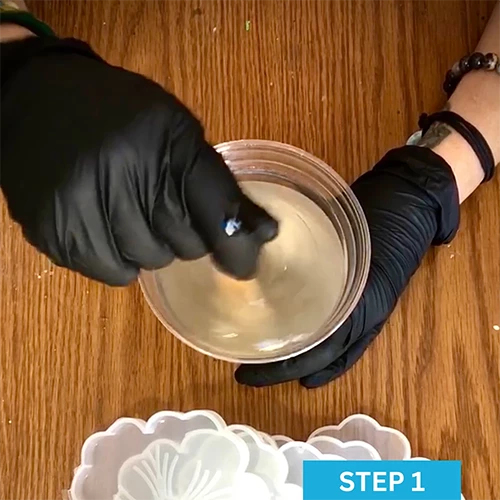
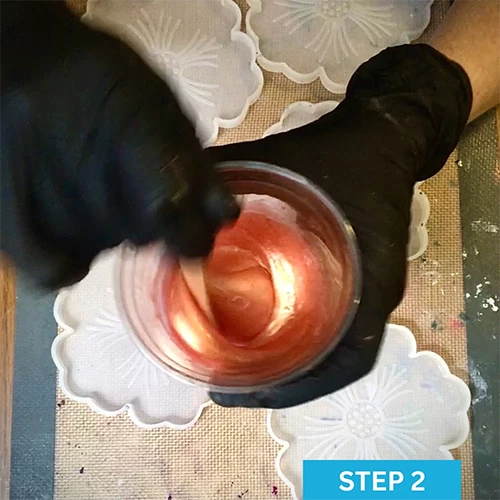
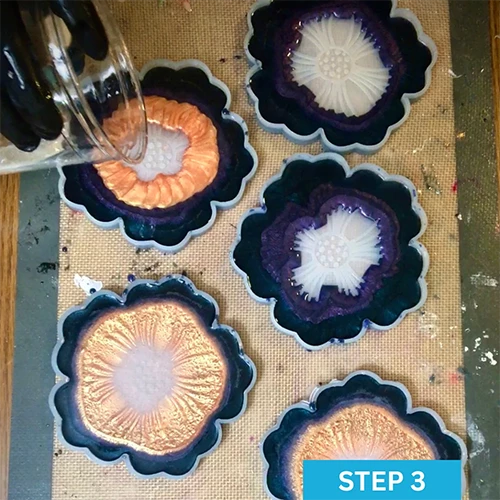

Step-By-Step Instructions
Prepare your workspace: Make sure you have a large LEVEL workspace and table protector mats laid out. Gather your materials and make sure you are working in a well-ventilated area.
Step 1: Mix Resin: Starting with the coasters and mix about 5.5 fl. oz. of hardener and 5.5 fl. oz. of resin, stirring thoroughly (about 4-5 mins.).
Step 2: Separate your resin into 5 different smaller cups & mix in additives. I used 3 different pigment colors, 1 plain clear (no pigments) & 1 opaque white pigment concentrate.
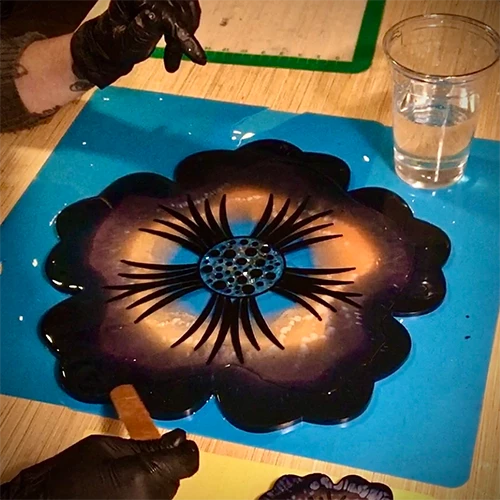
Step 3: Pour pigmented resin: Starting with the outer edges of the molds, begin with one color and proceed with the next two as you get closer to the center of the mold, leaving room to pour your clear resin in the middle.
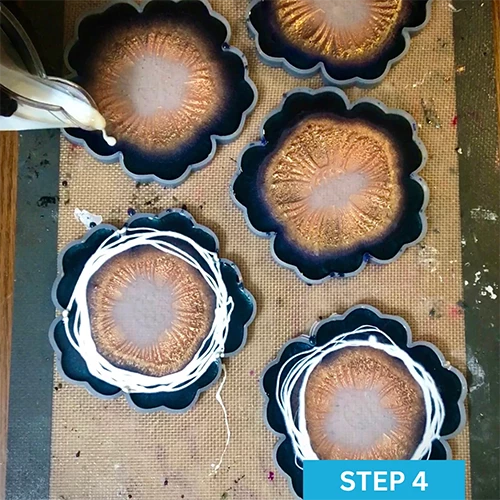
Step 4: Drizzle the opaque white pigment concentrate resin cup in a circle along all the colors towards the outer edges of your coasters. Add your flower’s “center” additive into your clear resin in the mold (crushed mirror, gold leaf, or any inclusion of your choice).
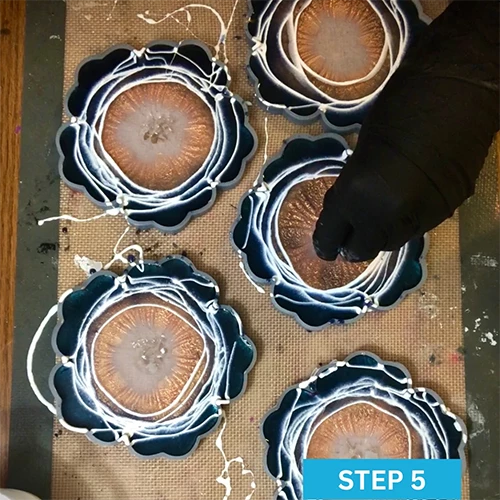
Step 5: Place inclusions: Using a stir stick, make sure your center bling is exactly where you want it to be. Then, using your Heat Gun, gently move it over your resin to pop any bubbles that have come to the surface. Cover & let cure for 24 to 72 hours.
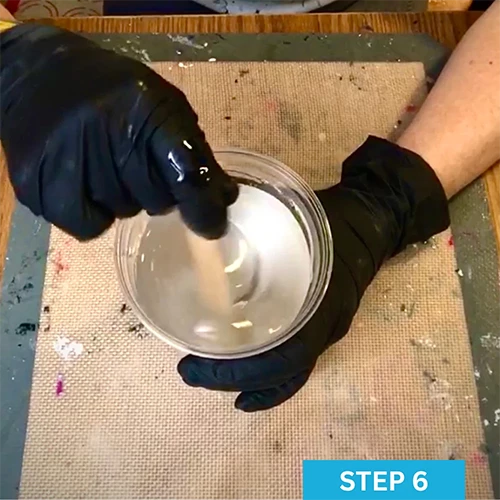
Step 6: Move to the Large Flower Mold! Mix about 10 fl. oz. of hardener and 10 fl. oz. of resin, stirring thoroughly (about 5-6 mins).
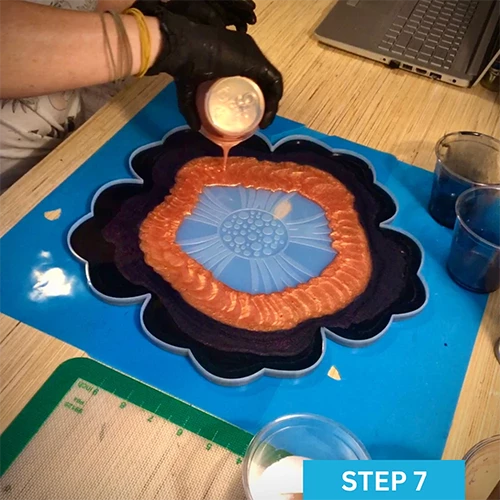
Step 7: Repeat Steps 2-5! Cover & let cure for 24-72 hours.
**Optional: If you’d like to color the flower petal detail from the mold that is embedded into your coasters, now is the time to add that. I use a precision tip mini squeeze bottle with acrylic paint & a little water to thin it out so it squeezes through the tip and carefully onto the coaster!
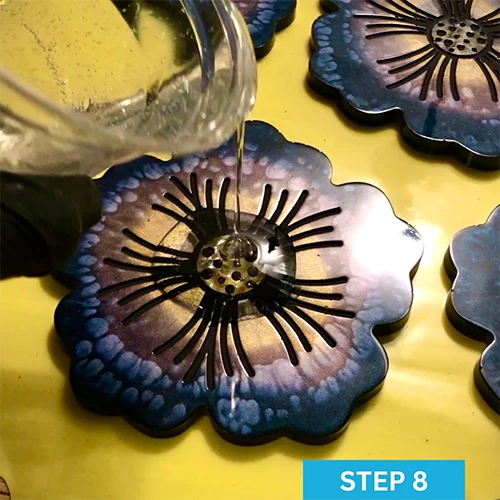
Step 8: Time to dome coat - mix about 5 fl. oz. of hardener and 5 fl. oz. of resin to coat all 5 coasters. Mix thoroughly (about 4-5 mins.) & carefully pour resin onto the middle of each coaster and slowly work the resin to the outer edges of the coaster using a stir stick, being careful not to spill over the sides.
**Artist Tip: If you do spill over, don’t worry! You can wipe it up & use a little isopropyl alcohol to carefully clean up the bottom and sides, so you don’t end up having to sand & polish your coasters.
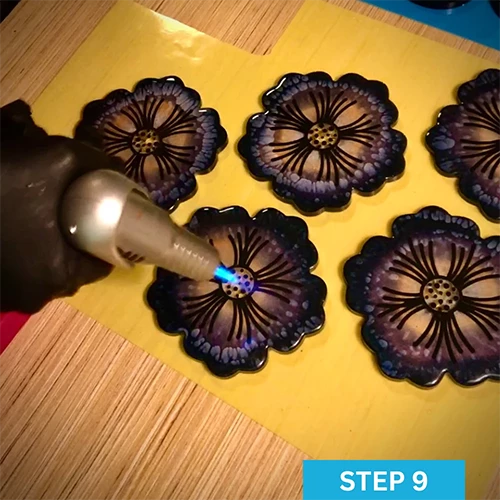
Step 9: Eliminate bubbles: Using your torch, quickly sweep the torch over the dome coat to eliminate any bubbles. Cover & let cure for 24 hrs.
Step 10: Dome Coat Large Flower - Repeat Steps 8&9, using about 6 fl. oz. of hardener and 6 fl. oz. of resin.
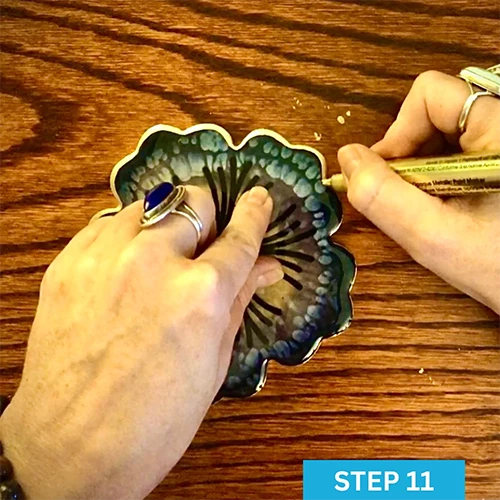
Step 11: Paint the edges in gold. Coat the sides 2 times, letting the paint dry in between coats then, run the gilding pen along the top edge onto your dome coat for an ultra finished & chic look! Voilá!
**Artist Tip: If you get any gold paint fingerprints on your finished coasters, isopropyl alcohol & a q-tip or soft cloth will clean that right up. Always good to have isopropyl alcohol around when using resin. It’s a lifesaver!
Art by: Megan Hogeman
What People Are Saying
This is the best resin!!!! It's so easy to use! Nice and clear results! When mixed slowly for 5 minutes, most, if not all, bubbles will be gone! This product comes with detailed easy instructions and tips.
I have recommended this brand to many friends and members of resin groups and after using it, they are in love too!
If you're looking for a great resin! Get this!!! You won't be sorry!!!
- Kimberly N.
Casting & Coating Epoxy Resin
Commonly Used To Create With Resin
Heat Gun
-
Multi-functional heat gun for various projects
-
Perfect for epoxy resin art and creating cells in artwork
-
Compact, portable, and lightweight design for convenience
-
No need for gas refills like a torch
-
High-quality materials with a 100% money back guarantee!
-
Multi-functional heat gun for various projects
-
Perfect for epoxy resin art and creating cells in artwork
-
Compact, portable, and lightweight design for convenience
-
No need for gas refills like a torch
-
High-quality materials with a 100% money back guarantee!
Visit Our Blog For Resin Project Inspiration
Want Free Stuff?
Join our email list to be notified of new project guides, special offers, free products and more!
Sign up now and receive a free Aqua glow powder sample!
Want to share your art with us?
Follow and tag us in your work to be featured on our pages!


