Preserving Flowers In Resin
Preserve your flowers for years to come using Art 'N Glow Epoxy Resin! Whether you want to preserve a sentimental bouquet or create custom jewelry or home décor, the process of preserving flowers in resin allows you to create unique and personalized pieces. With some basic materials and a few simple steps, you can easily create your own resin-encased floral creations.
-
Learn all about preserving flowers in resin
-
Be inspired by videos, images, and tips from real people who are familiar with the ins and outs of creating with resin
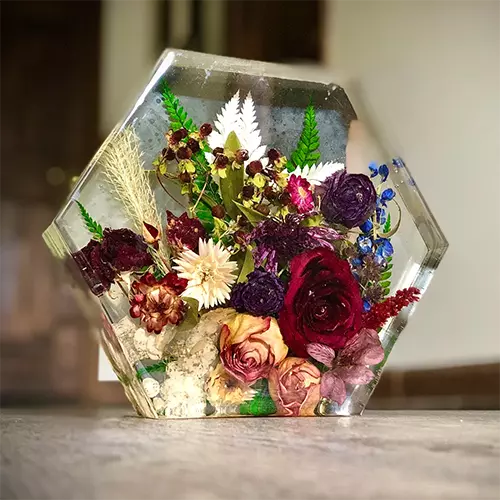
What Can You Create with Flowers and Resin?
Preserving flowers in resin is a wonderful way to capture their natural beauty and create stunning, long-lasting keepsakes. By encasing the delicate blooms in a crystal-clear resin, you can create unique jewelry, paperweights, or decorative pieces that will retain their vibrant colors and textures for years to come. This process involves carefully preparing the flowers, mixing and pouring the resin per the resin instructions, and allowing it to cure properly. Whether you're a beginner or have some experience with resin crafts, this guide will walk you through the steps to preserve flowers in resin and create beautiful, personalized creations.
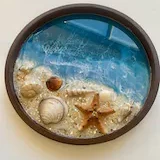
Art by: @MissMeggieArt
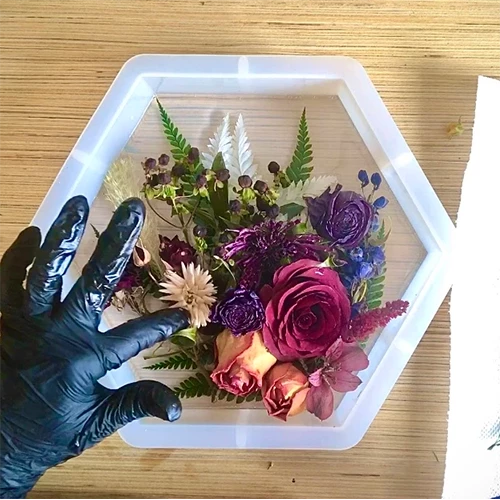
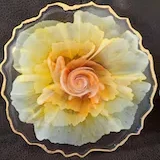
Art by: Megan Hogeman
DIY Project: How To Preserve Glowers In Resin
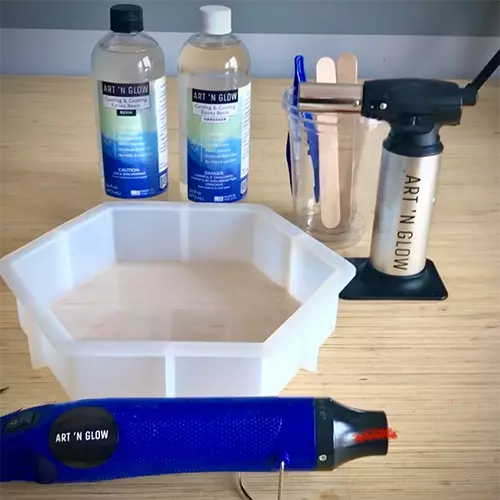
Materials to Preserve Your Flowers in Resin
-
Silicone Mold
-
16 oz Mixing Cups
-
Stir Sticks
-
Isopropyl Alcohol
-
Paper Towels
-
Painter’s Tape
-
Silicone Mats for workspace protection
-
Gloves
-
Scissors
-
Prepared & Preserved Flowers & Greenery
-
Project Cover
-
Rotary Tool (Dremel)/Sandpaper (if necessary)
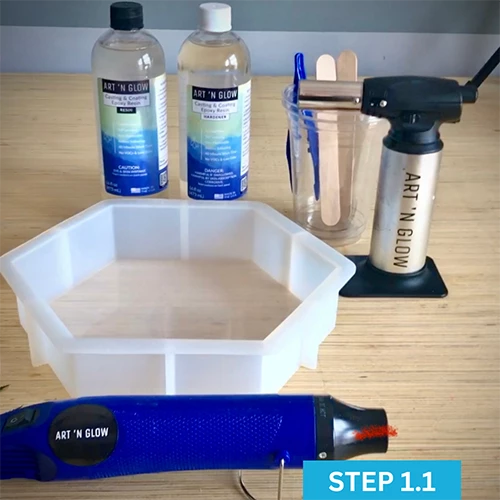
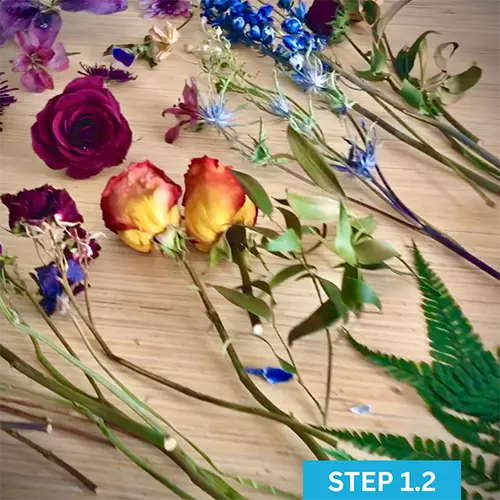
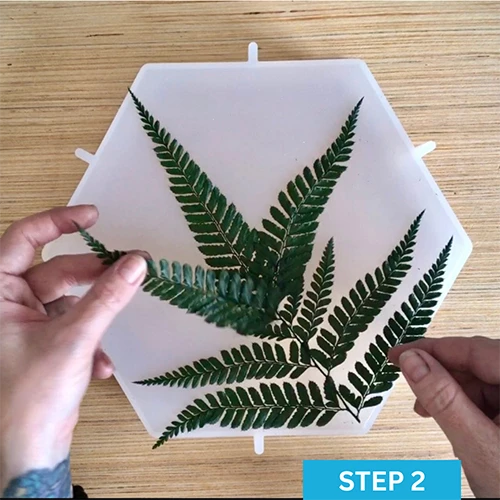
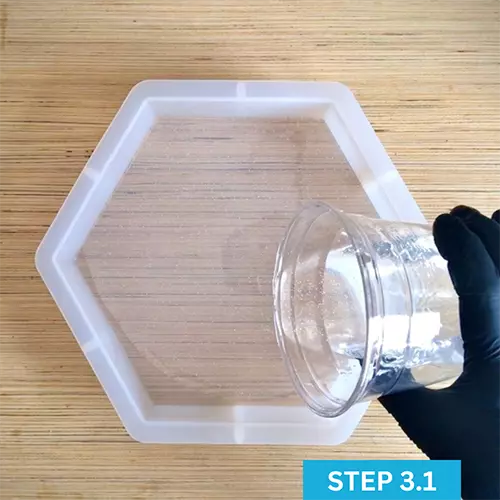
Step-By-Step Instructions
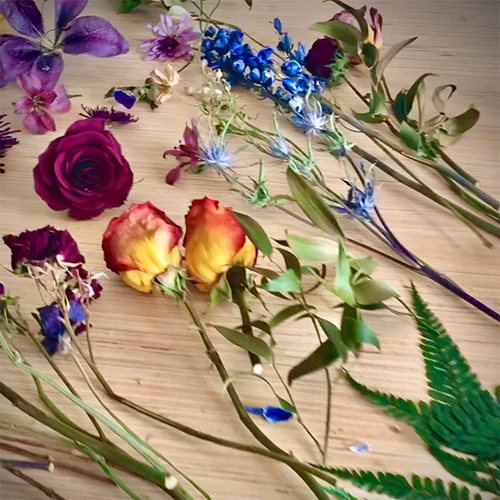
Step 1: Prepare your workspace. Gather all of your flora & fauna that you have preserved and lay everything out on a large workspace along with your clean silicone mold, scissors for trimming & your Art ‘N Glow Resin.
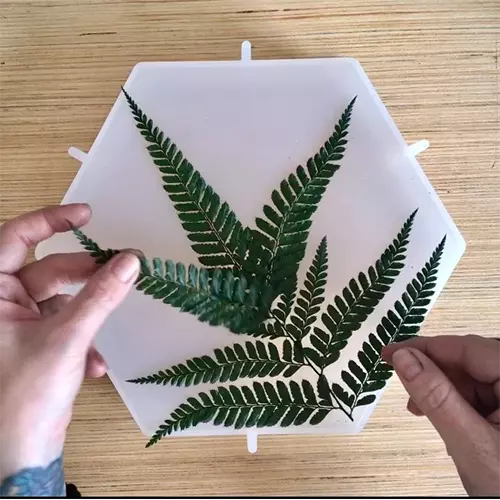
Step 2: Select your flowers and greenery. Start by picking out your bottom most pieces to begin assembling your “background,” and then a few on top as your base to the bigger flowers.
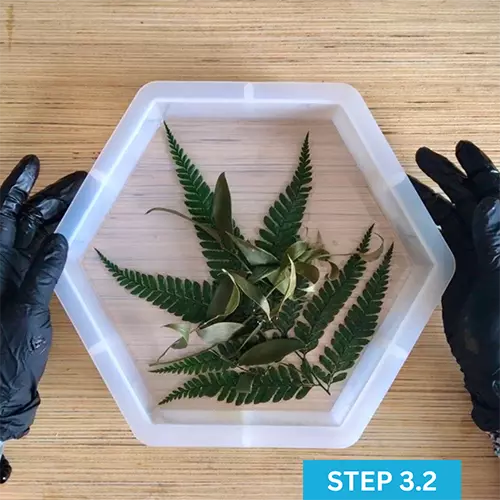
Step 3: Mix your Art 'N Glow resin and hardener (1:1 ratio by volume) to pour the first layer which will make a solid foundation for your arrangement. Lay your background layer of preserved nature on top of the freshly poured resin. Cover & let cure for 24 hrs.
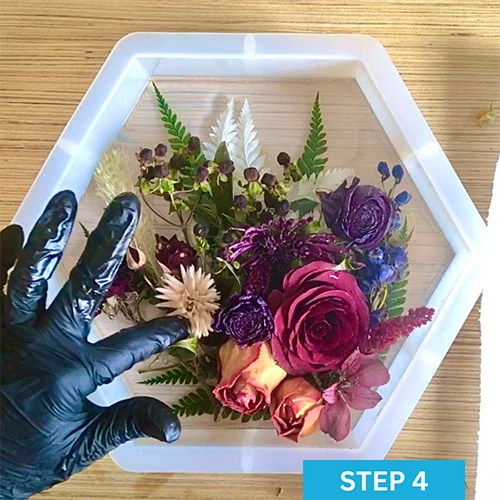
Step 4: Start arranging your flowers! Now that the base is laid down, you can begin by arranging them any way you'd like, handling the preserved pieces very carefully since they are incredibly brittle. Continue until you have basically all the big flowers & such in place.
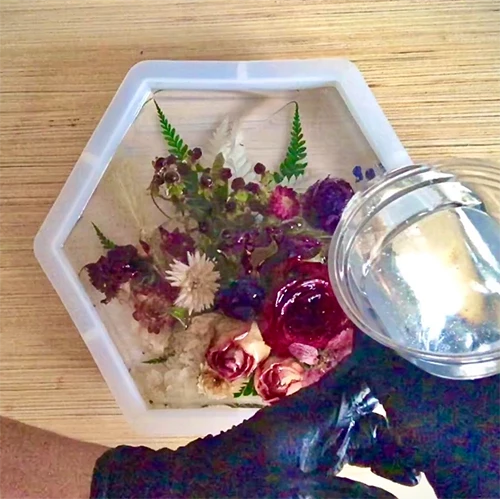
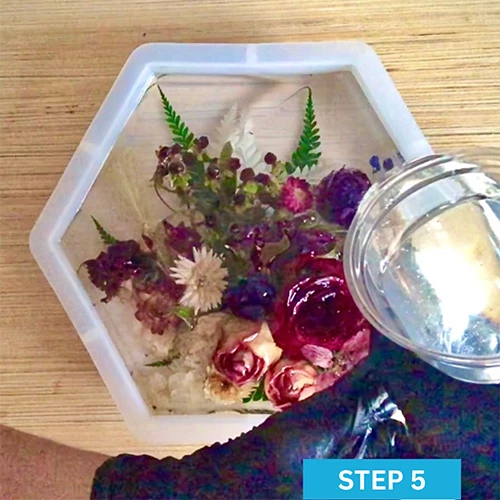
Step 5: Mix a second batch of resin to pour your second layer. Very slowly & carefully, pour all around your flowers trying not to get too much on the tops yet until your resin level gets a little higher in your mold & coats around the bottoms of your flowers. Check for bubbles. Cover & let cure for 24 hrs.
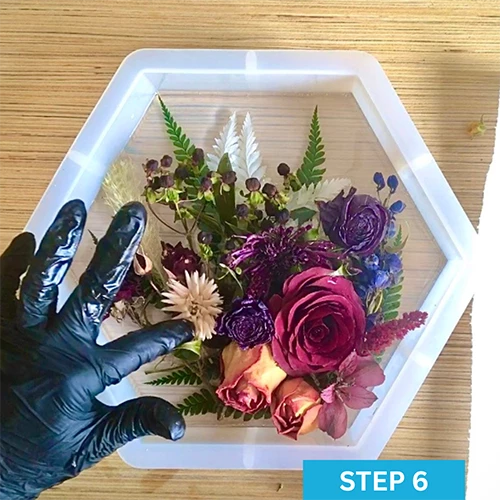
Step 6: Add more flowers. Now that your flowers are in place, you can add any top accent flowers if need be. Then, prepare your resin for the next layer, this time pouring on top of the flowers. Make sure to pour slowly & get in between any & all petals you can pour resin into. This step is when you need to start really watching for bubbles that will come up in between the flower petals. Cover & let cure for 24 hrs. If you can, check on it within about an hour to do another bubble check. Heat gun or torch if necessary.
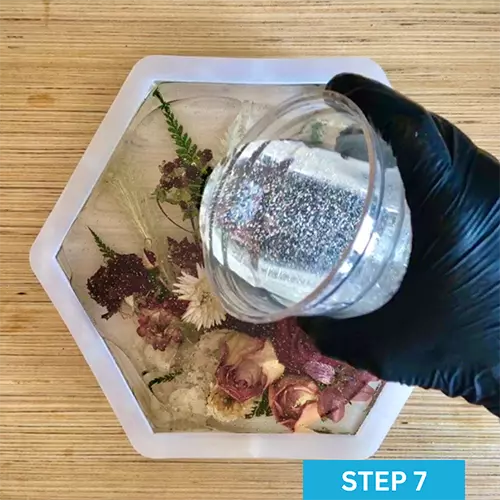
Step 7: Pour layers or resin. Keep adding layers in about ¼” thickness until you reach close to the top, letting them cure for at least 6 hours between pouring each layer.
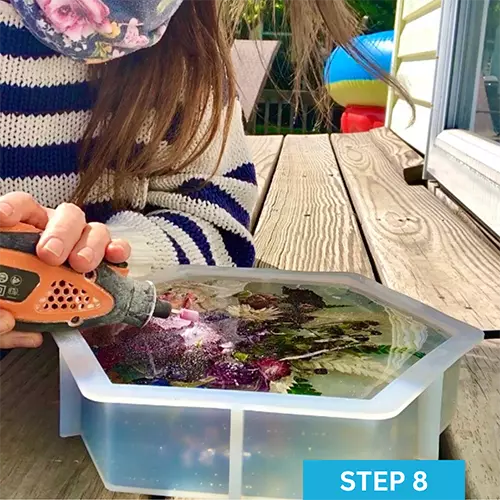
Step 8: Trim flowers (if needed). Now that you’re almost there, check for any flowers that are sticking out. Trim, dremel or sand them down neatly. I use my dremel so if I am grinding down a petal, I can shape it into a shorter petal rather than just sand it flat. Brush or clean any sanded/dremeled resin dust off of your project.
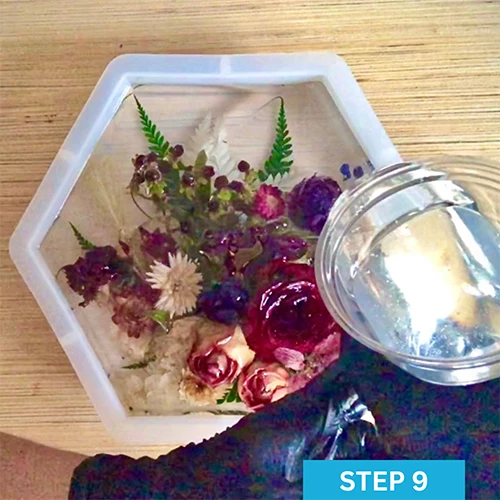
Step 9: Prepare for your final resin layer before unmolding. Fill that mold to the top. Remove any bubbles by sweeping the torch above your mold (6-8"). Cover & let cure 24 hrs.
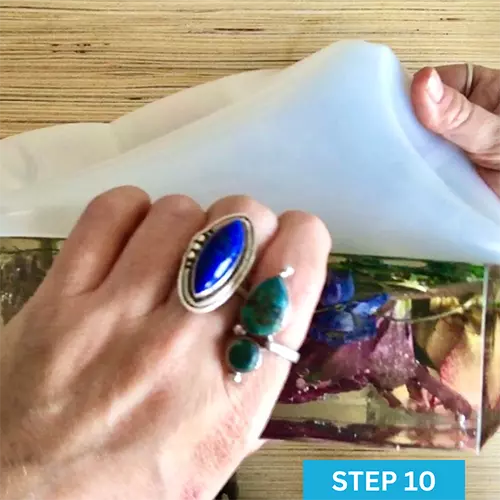
Step 10: Pop that beauty out of your mold and admire your work & patience. Trim and/or sand any imperfections.
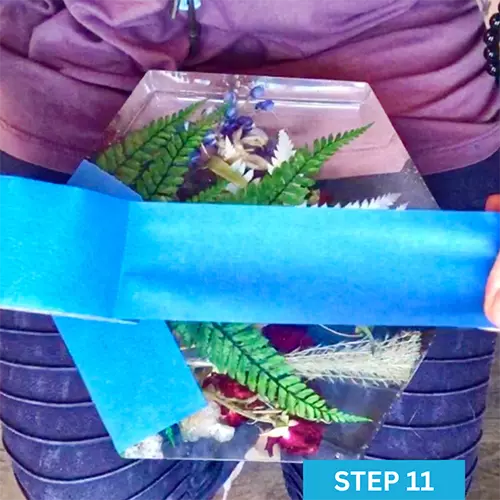
Step 11: Tape off the bottom to prepare for your final coat; AKA your flood coat.
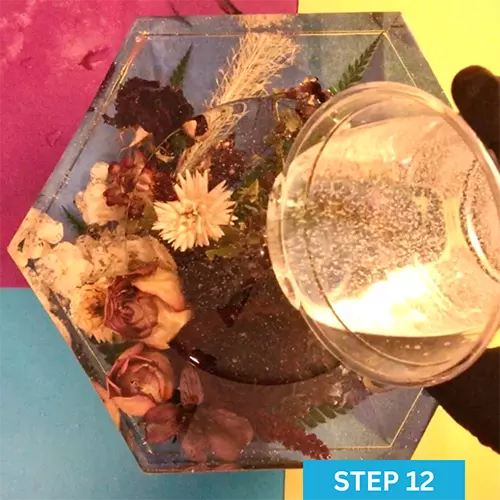
Step 12: Pour on that flood coat. Make sure you rub the resin all over the top & sides ensuring that every little bit is coated. Torch any bubbles. Cover & let cute for 24 hrs.
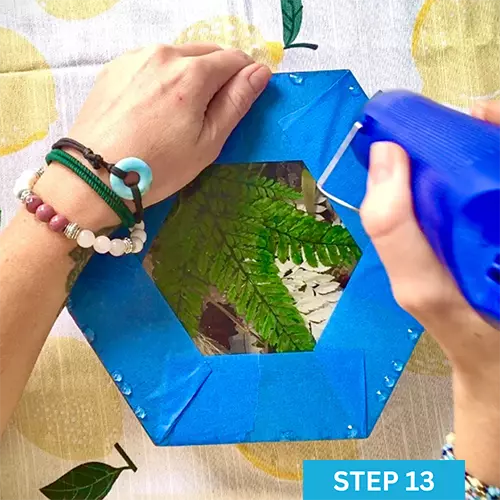
Step 13: Carefully remove your painter’s tape covered in resin drips from the bottom. To easily remove this, warm the tape & drips up slowly with your heat gun to pull it off with ease.
Voilà!! Your very own permanent flower bouquet frozen in time, made by you!!
Art by: Megan Hogeman
What People Are Saying
This is the best resin!!!! It's so easy to use! Nice and clear results! When mixed slowly for 5 minutes, most, if not all, bubbles will be gone! This product comes with detailed easy instructions and tips.
I have recommended this brand to many friends and members of resin groups and after using it, they are in love too!
If you're looking for a great resin! Get this!!! You won't be sorry!!!
- Kimberly N.
Casting & Coating Epoxy Resin
Commonly Used To Create With Resin
Heat Gun
-
Multi-functional heat gun for various projects
-
Perfect for epoxy resin art and creating cells in artwork
-
Compact, portable, and lightweight design for convenience
-
No need for gas refills like a torch
-
High-quality materials with a 100% money back guarantee!
-
Multi-functional heat gun for various projects
-
Perfect for epoxy resin art and creating cells in artwork
-
Compact, portable, and lightweight design for convenience
-
No need for gas refills like a torch
-
High-quality materials with a 100% money back guarantee!
Visit Our Blog For Resin Project Inspiration
Want Free Stuff?
Join our email list to be notified of new project guides, special offers, free products and more!
Sign up now and receive a free Aqua glow powder sample!
Want to share your art with us?
Follow and tag us in your work to be featured on our pages!


