How to Create Color Changing Resin Coasters

If you are looking for a way to add that extra wow to your resin casting, we think you will love using our thermochromic pigments. Our thermochromic pigments change from a color to clear or from one color to another when heat is applied. Check out this project where we add color-changing wow to resin coasters.
Let's get creative!
MATERIALS NEEDED
- Art ‘N Glow Clear Casting and Coating Epoxy Resin
- Art ‘N Glow Thermochromic Powder - (Hunter Green was used for this project)
- Art ‘N Glow Heat Gun or Artist's Torch
- Set of 4 Silicone Coaster Molds (Druzy Geode Coaster Molds were used for this project)
- Protective Tabletop Cover
- Level
- Silicone Mold Release Spray
- 3 Sheets Rose Gold Leaf
- Krylon Rose Gold Leafing Pen (or gold leaf pen of your choice)
- 16 oz and 8 oz Mixing Cups
- Mixing Sticks
- Gloves
PREPARE YOUR WORKSPACE
Make sure you are working in a well-ventilated area and have a LEVEL workspace with a table protector (plastic sheet, trash bag, or silicone mat). Lay out your coaster molds and give them a quick spray with silicone mold release spray. Mold release spray is optional, but it can help make it easier to demold. Next set out your Art ‘N Glow thermochromic pigment, 3 sheets of rose gold leaf and Art ‘N Glow resin.
STEP BY STEP GUIDE:

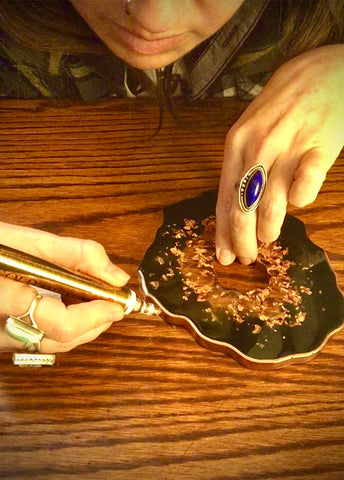
Step 1: Prepare your sheets of rose gold leaf by crumbling and gently ripping up into little pieces and placing into your mixing cup.

Step 2: Mix resin thoroughly per instructions and pour half into the rose gold leaf mixing cup. Add thermochromic pigment to the other half of the resin. Mix both thoroughly. We recommend starting with approximately 1 part thermochromic pigment to 20 parts resin and then additional pigment if needed to achieve your desired look.

Step 3: Pouring slowly, add the thermochromic resin mix around the outer edge of your geode molds with the circle in the middle, then add the rose gold leaf resin mix around the center so both are coating the bottom. Keep drizzling each resin until you’re happy with the ratio of each in your mold.

Step 4: Using the other 2 molds, without the circle in the middle, carefully pour each resin into the mold at the same time to make a half and half split down the middle. Keep drizzling each resin until you’re, once again, happy with the ratio of each.

Step 5: Waiting a minute or two, use a torch or heat gun in a sweeping motion over the resin to help remove any bubbles after letting them come to the surface. Cover your project and wait for 24 hours.

Step 6: Demold! (The best step!)

Step 7: Apply a resin topcoat, making sure to push the resin to the very edges of all the curves of your coasters. Remove bubbles with your torch or heat gun, then cover for 24 hours.
Step 8: Using your Krylon Rose Gold Leafing Pen, shake vigorously, and test on paper to get the paint pen working. Starting on the edges, apply 2 coats waiting 10 minutes in between each coat. Then, apply to the corners of the edges to get nice clean lines that show onto the resin topcoat to give it a beautiful geode look. Wait 10 minutes, apply a second coat. Wait 72 hours before using them to ensure ample curing time.

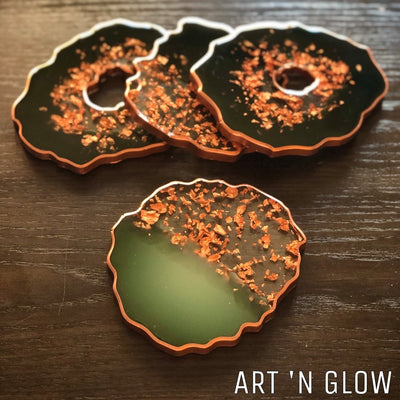
Step 9: Voilà! Go ahead and test out a warm mug of coffee to see your thermochromic coasters change color!

Check out these coasters made by Megan Hogeman:

Don't stop with color changing resin coasters. You can make any of your resin creations change colors with our thermochromic pigments. Browse our line of silicone molds to create anything from a color changing Tic-Tac-Toe game, phone grip or trinket tray.


Hi Ashley,
Our thermochromic pigments can switch colors thousands of times, however, extended exposure to ultraviolet light will degrade the color-changing properties.
I’ve heard thermochromic pigments are not suitable outdoors due to a lack of lightfastness.
Do all colors of thermochromic paint have the same limitations? Can they be used in clothing applications where the clothing might be worn outdoors?
Would UV light destroy a thermochromic paint job on a baseball cap?
Leave a comment