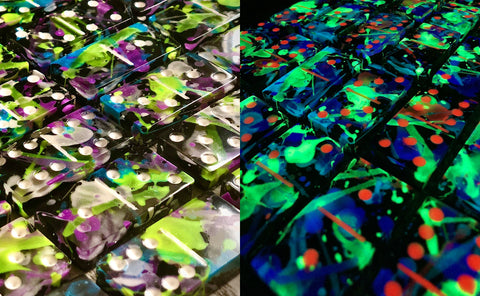
How to Make Your Resin Project Glow: DIY Resin Dominoes

We want to provide you with an easy step by step guide so that you can make these glow resin dominoes to take your family game night to the next level! We think you will love this new take on making dominoes. Let's follow along with artist Megan Hogeman as she creates dominoes that glow with a fun almost 3D effect!
Let's start creating!
Materials Needed
- Art 'N Glow Glow Paints (your favorite colors- Megan used fluorescent glow paints for this project)
- Art 'N Glow Epoxy Resin
- Artist's Torch or Heat Gun
- Paintbrushes for Splattering
- Resin Pigment or Dye
- Domino Set Silicone Mold
- Level
- Mixing Sticks
- Plastic Cups
- Needle Tip Applicator and Funnel
- 400 Grit Sandpaper
- Paper Towels
- Gloves
- UV Light (or Sunlight)
- Silicone Mold Release Spray
- Trash Bag / Plastic Sheeting / Drop Cloth
Prepare Your Workspace
Lay down a heavy-duty trash bag first (just to be safe), then if you want you can also add a drop cloth on top. Make sure you have a LEVEL workspace. Lay out your silicone mold and give it a quick spray with silicone mold release spray.
Get out your favorite colors of Art ‘N Glow Glow Paints, paintbrushes and paper towels.
Create Your Dominos

Step 1. Start Splattering! Using your paintbrush, splatter one glow paint color at a time, wiping your brush clean in between colors. Make sure to leave some negative space, as this is necessary to achieve the 3D layered look! Megan used fluorescent glow paint for this step.

Step 2. Pour. After mixing your resin and hardener per the instructions, pour first thin layer of resin in your mold, just covering the splattered paint and recessed dots in the mold (about ⅓ full). Go over the top of the resin with a heat gun or torch to pop any bubbles…..wait 24 hours.

Step 3. Repeat. After waiting 24 hours, repeat Steps 1 and 2 then continue to fill up the mold to ⅔ full, go over with heat gun again…..wait 24 hours.

Step 4. Pick a background color. Get out your pigment powder, resin dye, alcohol ink or pigment paste. Mix thoroughly with your resin. Pour the resin, filling the dominoes mold to the top…..wait another 24 hours.

Step 5. Demold your dominoes. We recommend waiting another 48 hours before handling to ensure your project is fully cured.

Step 6. Sand. Clean up edges if needed by sanding. Megan suggests using 400 grit sandpaper.

Step 7. Fill in the recessed domino dots with Art N’ Glow’s Glow Paint using a needle tip squeeze bottle. Megan used Neutral Red Glow Paint for her dots. Let Dry. Voila!
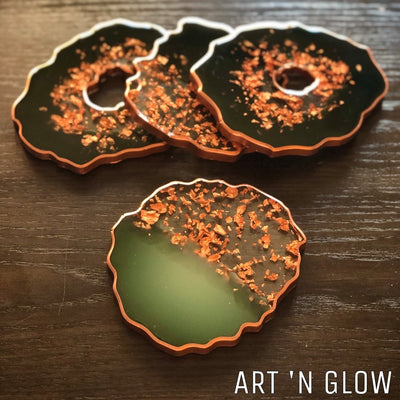
Use this same technique with any mold to create a custom glowing project.

Follow Megan:


Leave a comment